Contents
How to Draw Anime Male Hair Step by Step
Draw Anime Male Hair – This tutorial shows you how to draw anime hair and male manga. Includes nine hair extensions with step-by-step drawing examples and individual instructions.
There are many types of male anime hairstyles. This tutorial focuses on the most common and common ways you can see in many shows and fiction.
Although hair extensions may seem complicated, a good way to manage the process is to imagine divided into different parts. These are front, sides, and back/top.
To help avoid mistakes, this lesson uses the “see it all” drawing technique. This means that if you follow using pencil and paper, it is important that you first make simple lines that you can easily erase. You will need to do this with parts of the drawing before finishing. You can darken the lashes after completing the line drawing.
Drawing “Buzz Cut” Male Anime Hairstyles
Although this “hairstyle” has absolutely no hair, it is good to start with as it shows the hair. This will be important to draw other styles. (Draw Anime Male Hair)
Before painting the hair, draw the head as shown step by step example above.
Step 1 – Draw Before “Buzz Cut”
The “buzz cut” front will be part of the hairline. It is drawn with just two large curves forming a tip slightly below the top of the head.
Please note that this is a basic example of how to draw hair. It can vary in shape and position for real people and anime characters.
Step 2 – Draw the sides of the “Buzz Cut”
Add the sides of the hairline with another pair of curves that meet the first set a good distance above the ears.
Step 3 – Draw Above / Behind the “Buzz Cut”
Finally, draw the upper/back part of the “buzz cut” hair. Depending on the size of the yard, only one or two toys will fit. If the hair is almost completely cut, you can use a scalp to describe it as high. (Draw Anime Male Hair)
In this case, the hair will be a little longer, so it will be pulled in just a little volume. To do this, draw the most beautiful hair to hug the head shape from the top of the ears gradually to the top.
Step 4 – Complete the Line Drawing
First, to complete the line drawing, wipe the top part of the head that should be covered with hair. Then go through your drawing with a black beat.
Step 5 – Add Specific Shading
You can also give the hair a basic shine/shading to make it look younger.
Hair Design Anime Short Male
Short anime hair will usually be styled into smaller pieces compared to long hair. This is because short hair cannot reach far enough to join as a large clump. (Draw Anime Male Hair)
Before painting the hair, draw the head with a hair frame (based on the first tutorial example).
Step 1- Draw The Front Of Short Hair
Draw the front part of the short hair and the base of their locks near the hairline.
Step 2 – Draw Short Sides of Hair
In the same way as the “front hair”, draw the side strands next to the hairline again.
Step 3 – Draw Top / Back of Short Hair
Finally, draw the back / top part of the hair with a little “ends” on the head. Also, make sure that you draw lumps that lean slightly down instead of out of the head like the sun’s rays. (Draw Anime Male Hair)
Step 4 – Complete the Line Drawing
When you have finished painting the three sections of hair, erase the hairline and the parts of the head that are covered with them. You can also trace your drawing with black lines.
Step 5 – Add Specific Shading
You can see what short hair will look like with the basic shading in the example above.
Drawing Anime Male Hair Long Length
Medium-length hair (or some other variation) is probably one of the most common hairstyles in anime and manga. It is very common for protagonists to be “middle boys”. (Draw Anime Male Hair)
Before painting the hair, outline the head and hair.
Step 1 – Draw the Front of Medium Long Hair
Draw the front of the hair with large braids that start from the top of the head and then slide down right through the hairline. Make the clump/clumps in the middle longer than the sides.
Step 2 – Draw Medium-sized Hair Stones
Add the side parts with just a few long strands each and rotate the top of the head down to the bottom near the ears.
Step 3 – Draw Top / Back of Medium Length Hair
Finally, add the top/back of the hair with a “roof-like” shape at the top, where the hair falls out and turns into pieces. (Draw Anime Male Hair)
You can also add lumps that come out from under the ears.
Step 4 – Complete the Line Drawing
Wipe the sections of the hairline and head covered with hair, and walk over your scalp with dark lines.
Step 5 – Add Specific Shading
Once you are done with the line drawing, you can add basic shading, as shown in the example above.
Drawing Anime Male Medium Medium Hair
This hairstyle is very similar to the previous model but a little longer. One common feature of these hairs is that the eye-catching parts are usually swept to the sides with one large bump running down the middle of the face around the tip of the nose. (Draw Anime Male Hair)
Start the drawing with a frame for the head and hair.
Step 1 – Draw the Front of Medium Long Hair
Start with a real haircut by adding the part that goes down the middle of the face. It can start from the top of the head and descend around the tip of the nose (if shown).
Draw this part as two interlocking cones that bend in opposite directions to form an “x” next to each other as they pass each other. You can also draw a small split on each clump to make the hair look a little more natural.
Step 2 – Draw Medium Long Hair Sides
Add the side parts of the hair as two large curved shapes that “hug” the head slightly and split into smaller bumps along their ends.
Although, in reality, these “side hairs” also hold the front part of the hair on the cell phone separate them, as shown in the example. (Draw Anime Male Hair)
Step 3 – Draw the Top / Back of Medium Long Hair
Finally, draw the back / top parts of the hair. To show that it is long, leave a good distance between the piles of lumps in the upper part with a few short lumps protruding very high.
Step 4 – Complete the Line Drawing
When you are done with a light line drawing, wipe the hairline/head parts covered with hair and pass everything with a black stroke.
Step 5 – Add Specific Shading
You can also add basic shading, as shown above.
Drawing Anime Hairstyles For Combed Man
As the title suggests, this example with hair looks a little comb.
Before painting the hair, draw the head and hair as shown above. (Draw Anime Male Hair)
Step 1 – Draw the Front of the Combed Hair
The front part of the hair will be the part that shows that it is “combed”. Keep them far below the hairline, as the hair will need a certain length to be combed this way. Draw “front hair” on medium-sized combs and all kinds of “sweeps” on one side. At the same time, try and draw each clump pointing in a different direction to make the hair look natural.
Step 2 – Draw Combed Hair Stones
To make the hair look very clean, you can paint the sides dirty as in the example above. If you want to look good, you can paint yourself as a “medium length” model.
Usually, a few clumps you draw, and when they point too far in the same direction, it will look good on the hair or part of the hair. Drawing multiple collections in different directions will often create a dirty look.
Add the back / top part of the hair to two large curves from one side above the head. The whole shape should be hugging the head/face closer to it as it descends sharply. You can also add small clumps very low and slightly above the ears. (Draw Anime Male Hair)
Once again, these pieces will only slightly remove the “clean” look and make the hair look a little more natural.
Step 4 – Complete the Line Drawing
Wipe the hairline and part of the head covered with hair. Then pass a light line drawing with black lines.
Step 5 – Add Specific Shading
You can also use a basic hair conditioner to make them look a little brighter, as shown above.
Back Painting For Anime Male Hair
The hairline is very important for combed back hair as it looks very good.
Start the drawing by first defining the shape of the head and then placing the hairline.
Step 1 – Draw the Front of the Combed Hair Back
Draw the front part of the combed hair on the back as the eyebrows are “teeth” running along the hairline. You may notice that this is a bit different from the “buzz cut”, where you can use the hairline itself as “before the hair”. (Draw Anime Male Hair)
The reason for drawing “teeth” is because the hair in this example is very long, and these teeth and all the others will help create the look of the hair strands pulled back.
Step 2 – Draw Backed Hairstyles
On the sides of the hair, you can properly trace the hair follicles and attach them to the “teeth” of the front section.
Step 3 – Draw Top / Back Combed Back Hair
The back / upper part of this case is somewhat complex as the hair cut back this way will usually create all sorts of small bumps and bumps.
When drawing these bumps, try to place them so that their combined structure still has the same flow in them. Which means you don’t find one part too close to the head and too far away.
There should be a gradual change when the bumps and clumps are near the head around the ears and away from the top. (Draw Anime Male Hair)
Try making “hair bumps” around the upper part of the head randomly, some larger and some smaller but keep the nodules above the ears, usually smaller.
Draw a few clumps between the bumps again. You can draw many of them “with a wave”.
Step 4 – Complete the Line Drawing
First,t, wipe the hairline and part of the head covered with hai with this step. Next, draw some curved lines (or waves) between the bumps/hair follicles of the back / upper part and the “teeth” of the front part.
You can also add a small bundle of hair (or a pair of strands) hanging down the middle of the top of the hairline, as shown in the example. Just delete part of the hairline and add it.
When you have finished drawing the line, jump over it with a black stroke.
Step 5 – Add Specific Shading
Finally, as shown above, you can add basic shading to the hair.
Drawing Long Anime Male Hair
Some men’s long hair can be styled in the same way as a woman’s. However, as in this example, long curly hair usually occurs in men. (Draw Anime Male Hair)
Draw the head and hair before starting the hair.
Step 1 – Draw The Front Of Long Hair
Similar to the previous example of “combed back hair”, draw a small “tooth-shaped” shape near the hairline of its front part. In this case, the teeth will be slightly smaller and larger than the previous model.
Step 2 – Draw the Sides of Long Hair
And like the previous example of “back” hair, draw the side sections carefully tracing the hairline and combing with the “teeth”.
Step 3 – Draw On / Back Of Long Hair
Draw the back / upper part of the hair, carefully tracing the shape of the upper part of the head away from it. It should then start to “blow” a lot from the top of the ears.
Inside the back / top frame, draw a pair of lines from the ears to the shoulders to help define the volume of that part of the hair.
Step 4 – Complete the Line Drawing
To complete the drawing of the “long” head of hair, first, wipe the hair and the head parts covered with hair. Next, you can erase part of the hairline and draw a bunch of hair hanging down the middle of the face. This is optional but can make the hairstyle look a little more interesting.
Then draw curved lines on the top and sides of the hair from the outside to the hairline. This will create a hint of hair extensions. (Draw Anime Male Hair)
You can also draw wavy lines around the lower part of the hair to show the curling irons usually formed in that area.
Step 5 – Add Specific Shading
To complete, you can add basic shading, as shown in the example above.
Drawing “One Eye Covered” Male Anime Hair
With this style, the hair “balance” is shifted to one side of the head, covering one eye.
Before dying hair, first dye the head and hair.
Step 1 – Draw Hair Front “More Than One Eye”.
As expected, the front part of this hairstyle will be much larger and longer. You can think of everything as dividing two large groups into one small and one large (covering the eye). You can draw a split in these starting from the top of the head.
Draw clumps on the “covered side” are usually larger and slower (below the ear) than on the open side of the face.
Step 2: Draw Hair Sides “Over One Eye”.
There is nothing more to the “side hair” clumps in this hairstyle as they are well integrated with the previous section. Draw them as an extension of their “front hair” side.
Step 3 – Draw on / After “One Eye” Hair
Draw the back / top part of the hair around the head (some distance from it). You can draw small clumps in their large shape near the top and sides.
Draw the lower part of the hair (below the ears) into large and long pieces. This will help give it a slightly dirty/sticky look.
Step 4 – Complete the Line Drawing
To complete the line drawing, first, wipe the strands of hair and scalp parts of the hair and then trace over your drawing with black lines.
Step 5 – Add Specific Shading
You can optionally add a basic search, as shown above.
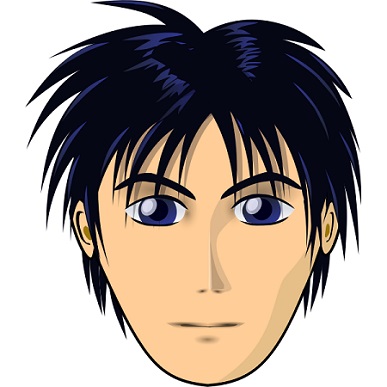
Painting Anime Spiky Man’s Anime Hair
This “nails”-style hairstyle is flame-shaped and can sometimes emphasize the personality of “fiery” characters.
Start the drawing by showing the head and hair, as shown in the first step above.
Step 1 – Draw the Front of Spiky Hair
Draw the front part of the hair with small bumps that start near the centre of the hairline and go down to the sides.
Step 2: Draw the sides of the spiky hair.
Draw “side hair” with just a few small strands.
Step 3 – Draw On / Back With Winged Hair
As mentioned before, the back / top parts of this hairstyle will have a combined flame-like shape.
To create a fire shape, draw hair strands that are thin and short from the top of the ears and become larger and longer as they rise to the top of the head.
Clumps should also slowly turn from head to toe when pointing at the top. At the same time, try and randomly adjust the size and direction of each clump.
Step 4 – Complete the Line Drawing
Complete the line drawing by wiping the hairline and part of the head covered with hair. Then walk over it in black lines.
Step 5 – Add Specific Shading
You can also add very simple shading, as shown in the example above.
Conclusion
This tutorial shows you how to draw some of the male hairstyles commonly seen in anime and manga. Yes, there are many more, but it isn’t easy to cover too much in one guide.
Special Keywords – How To Draw Boy Hair For Beginners, How To Draw Anime Boy Eyes, How To Draw Fluffy Hair, How To Draw Anime Hair Step by Step