Contents
How to Draw an Anime Character
Strategy 1
1Drawing an Anime Head and Face
Anime is a well-known liveliness and drawing style that started in Japan. Drawing anime characters can appear to be overpowering, particularly while you’re taking a gander at your number one anime that was drawn by experts. Luckily, anybody can figure out how to draw anime characters, and the cycle is genuinely basic assuming you separate it into little advances.
Drawing an Anime Head and Face
Bring an oval and separate it into 4 areas. This will be the essential framework of your anime character’s head. The extents don’t need to be accurate, yet make the oval smaller at the base since that will be the jawline. Whenever you’ve drawn the oval, define an even boundary through the focal point of it. Then, at that point, define an upward boundary through the focal point of it that crosses with the flat line. Afterward, you’ll involve these lines as advisers for drawing the facial highlights.
If you believe your personality should have a more extensive face, enlarge the lower part of the oval so it’s simply marginally smaller than the top. Or on the other hand, assuming you believe your personality should have a thin face, make the lower part of the oval even smaller than the top. There’s no single head shape utilized for all anime characters, so you can explore until you find one you like.
2.) Draw the eyes under the level line.
Anime eyes are huge and overstated, and they as a rule take up around 1/4 to 1/5 of the level of the face. To draw one, begin by drawing a thick upper lash line just under the level line you drew and on one side of the upward line. Then, at that point, draw a half-circle descending off the upper lash line, and attract a dark understudy its focal point. Then, draw a restricted, flat line under the circle for the lower lash line. At long last, conceal in the circle around the understudy, leaving some blank area so it appears as though the light is shining off of your personality’s eyes. Do the same thing on the opposite side of the upward line to make the other eye.
Tip: Adjust the shape and size of the eyes relying upon whether you’re drawing a manly or female anime character. For a ladylike person, make the eyes taller and rounder, and add a couple of thick eyelashes falling off the upper lash line. For a manly person, make the eyes more limited and more modest.
3.) Sketch the eyebrows over the flat line.
Draw a long, descending bending line for every eyebrow. Make them somewhat longer than the upper lash line you drew for the eyes. Then, thicken the finishes of the foreheads that are at the focal point of the face.
If you’re drawing a ladylike anime character, make the eyebrows genuinely meager. For a manly person, thicken the eyebrows so they’re more noticeable on the face.
4.) Add the nose somewhere between the flat line and the jaw.
Anime noses are inconspicuous, and they’re normally possibly characterized while you’re checking out a person from the side. To draw your personality’s nose, draw a short, basic vertical line along with the focal point of the face at the midpoint between the level line and the jaw. Make the line longer assuming you maintain that your personality’s nose should be huge.
Make the nose the littlest element on your personality’s face.
The nose will cover with the upward line you drew. To see it better, make it hazier than the upward line, or delete the upward line around the nose.
Manly anime characters once in a while have noses that are more articulated, however, that is not generally the situation. If you believe your personality’s nose should be more recognizable, underscore the upward line to address the lower part of your personality’s nose. Additionally, draw a triangle-formed shadow on the button so it seems as though the light is hitting your personality from the side.
For specific styles of anime, such as chibi, you don’t have to draw a nose by any means!
5.) Draw the mouth somewhere between the nose and jawline.
Like anime noses, anime mouths are basic and unobtrusive. To draw your personality’s mouth, define an even boundary that is probably the length of the space between their eyes. Try not to stress over drawing lips. Make the mouth the second littlest component on your personality’s face, after the nose.
Bend the line up assuming you maintain that your personality should be grinning or descending if you believe that they should be disturbed.
Assuming that you believe that your personality should be grinning and getting defensive toward, a vertical bending line under the flat line you drew for their mouth. The void area between the bent line and the even line ought to be about half however tall as the mouth seems to be long. That space will be your personality’s teeth.
6.) Add the ears to the side of the head.
Assuming you believe your personality should have long hair that is covering their ears, skip drawing the ears. In any case, if your personality’s hair will be short, draw a restricted oval on each side of the head. Have the highest point of the ears line up with the level line going through the focal point of the face, and have the bottoms line up with the lower part of the nose. Then, at that point, draw the folds of the ear inside every oval.
Explore different avenues regarding the size of your personality’s ears if you maintain that they should be greater or more modest.
7.) Draw the hair on your personality’s head.
The haircut you decide for your personality depends on you, however by and large, anime hair highlights pointed closed and unmistakable segments. You can draw a short, hummed hairdo, a medium-length style, or long, flowy hair. Whichever haircut you pick, try not to draw individual strands of hair. All things considered, draw enormous segments of hair, similar to 4 or 5 spikes at the finishes.
If your personality has long hair, you could draw 2 ponytails, one on each side of the head, with spiked closes. Or on the other hand, you could draw their hair pulled up with a round bun at the top. On the other hand, you could give your personality bangs by drawing 3 or 4 particular areas of hair descending over your brow.
For a more limited haircut, you could draw 3 or 4 unmistakable segments of hair diving to the side over your personality’s temple. Or on the other hand, you could draw a hairdo with practically no bangs and define a couple of boundaries running from their hairline to the rear of their head so it seems as though their hair is brushed back. On the other hand, you could draw a jawline length weave that is separated into a few thick segments.
8.) Delete the even and vertical rules you drew.
Delete them cautiously so you don’t eliminate any of the facial highlights accidentally. Utilize a little eraser so you’re less inclined to commit errors.
When you delete the two lines, your personality’s head and face are done!
Technique 2
Portraying an Anime Body
1.) Draw a stick-figure framework of your personality’s body.
Utilize straight lines for the arms, middle, and legs. Make the arms and middle comparative long, and make the legs around 1/3 longer. Then, draw triangles or ovals for the hands and feet. Make the hands around 1/5 the length of the arm, and make the feet around 1/6 the length of the legs.
To get the extents right, make your stick-figure frame multiple times as tall as your personality’s head.
Have the arm lines start around 1/5 of how down the line you draw for the middle.
Have the stick-figure diagram of your personality catch anything that presents you maintain that they should be in. For instance, if you believe that your personality should be sitting, draw their legs so they’re twisted. Or on the other hand, assuming you maintain that your personality should wave, draw one of their arms so it’s twisted.
2.) Frame the general states of your personality’s body.
Drawing over the stick-figure frame you made, sketch an unpleasant diagram of your personality’s middle, arms, hips, and legs. Try not to stress over making the diagram exact yet. As of now, you simply need to address the various pieces of the body with essential shapes.
Draw ovals for the upper and lower arms and legs, and afterward draw a circle at each joint for the knees and elbows. Relatively, make your personality’s upper and lower arms a similar length and size. Make their upper legs thicker than their lower legs.
For the middle, draw a quadrilateral (a 4-sided shape) that is more extensive at the top and smaller at the base. In the long run, the wide corners at the top will turn into your personality’s shoulders.
To frame the hips, draw an oval over the place where the middle and upper legs meet.
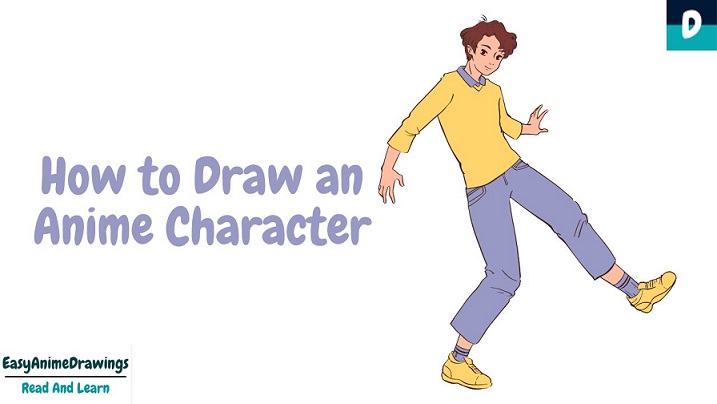
Anime characters will generally be tall and slight, however, you can explore different avenues regarding various levels and body shapes!
3.) Associate and refine the general shapes you drew.
Follow around the external edges of your personality’s body so you have one consistent blueprint. As of now, begin refining the various pieces of the body so they look more sensible, similar to your personality’s hands, shoulders, hips, and neck. At the point when you’re done, you’ll have a full, definite blueprint of your personality’s body around the more dynamic diagrams you drew previously.
To interface and refine the legs, draw around the external edges of each shape that makes up the legs (the ovals for the upper and lower legs, the circles for the knees, and the shapes you drew for the feet) so you have one consistent framework of every leg. Make the framework smooth (with next to no holes) so the legs look reasonable.
There’s nothing for the chest area, you wouldn’t do the same with the arms and middle. Balance the sides of the middle for the shoulders, and define 2 boundaries bending up away from the focal point of the middle for the neck. Likewise, interface the shape you attracted for the hips to the middle and the upper legs.
Tip: If you’re drawing a manly anime character, expand the chest, midriff, and shoulders. If you’re drawing a female anime character, restricted the shoulders, make the hips more extensive, and frame the bosoms. Additionally, take the midsection in so it’s smaller.
4.) Delete the stick-figure framework and shapes you drew.
Be cautious deleting so you don’t coincidentally eliminate any of the refined, last diagrams that you drew. At the point when you’re done, you ought to be left with a flawless, consistent blueprint of your personality’s body with next to none of the first rules you drew inside.
[wptb id=1613]