Contents
How to Draw and Color Anime Hair
Draw Color Anime Hairs – Hair is one of my top 5 favorite things to draw and color, and this was also a requested tutorial. I tried to add as much information as possible while keeping the video fun to watch and full of tips! We, Will, Learn – Easy Anime Hairs Drawings, Anime Girl Drawing, Anime Drawings, Anime Drawing
Nothing here is a hard rule, and it’s mostly to show how I do things, so I hope you enjoy it.
Using References
It’s tough to draw things when you don’t check what they look like in real life. So every time you’re stuck, search for photos! Not just of anime drawings, but actual people as well. (Draw Color Anime Hairs)
Where, you ask? There’re plenty of places; you can go on Pinterest, Instagram, DeviantArt, etc.! And if you think that’s cheating, copying, or stealing, it’s not. Every great artist uses references, so you should too!
Shape and Volume
In anime, hair and eyes are often used to express emotions and a character’s personality, so they’re usually given more details than in real life. But this is drawing, so there aren’t any complex rules for this! Let your hand flow, and practice your creativity. Take a look at your favorite anime drawings. How does the Hair make you feel?
Straight black hair feels serious;
While fluffy curls are warm and welcoming!
Sketching Tips
I start hair just thinking of the general outline without giving much attention to details: only the general shape matters when sketching. (Draw Color Anime Hairs)
Think of the skull and add some padding if you don’t know where the hair starts in the head. A simple line in the middle should be enough to represent that. You can make the top part more complex as you learn how hair works.
Also, it’s good to work with S curves. Even if the hair is straight, it can be a long open S, making the hair look light and flowy. With wavy hair, the S curves will be more visible!
For perfectly curly hair, I use a different technique. I first draw spring and define the front part. Then, I duplicate that line shape.
After that, I erase the lines on the back and connect them to form a full spring!
You don’t need to draw every strand like that (feel free to do so if you like, though!); a few will be enough to give the feeling you are looking for, and the back can have a simple shape.
Don’t be afraid to delete what looks wrong and try again. Even if it takes time, spending time on this part to get the feeling right will pay off in the end. (Draw Color Anime Hairs)
Another important tip is to work with long lines, not short chicken scratches. It will make your drawing look more polished, and you will have fewer chances to hurt your wrist!
Take breaks if you are lost, and look up new references to refresh your eyes. Make sure to leave them open while you draw; it will help a lot.
About Lineart
I will clean up the sketch depending on the drawing instead of creating a line.
By “clean up,” I mean I will erase the messy lines and go over them when necessary, giving it a different feeling than a clean line. This helps me relax about art and not worry too much about details.
You don’t need to over-zoom and glue your face on the screen to ensure the lines are perfect! You are likely to be the only one that will be able to spot your small mistakes. (Draw Color Anime Hairs)
The brush for lineart can be the same as sketching, but this will depend on how you want it to look. I highly recommend looking at the formal meetings or checking Clip Studio Assets. There are many fun brushes you can easily download and use.
You can make the lines thicker where they intersect or where shadows will be in this phase. It will give your lines more depth.
Shading
Once the base color is added, define your light source. Remember your basic lessons about ball shading? Do exactly that. (Draw Color Anime Hairs)
To do this, lay out a general shape with the shading color.
Once you have the general shape defined, you can polish it to your liking.
But as you are still learning, you don’t need to go fancy on the shading. Go slowly, within the scope of what you feel is challenging enough for your current skills, then make it complex as you go!
As you can see, there’s some backlight on the black that matches the grey on the white side. I usually add some extra color to the hair I draw because it looks pretty!
Now, How to Pick the Right Color?
The short answer, there is no right color! Play with them until you find what you like: try pink in blue, purple in green, orange in yellow, and so on. Have fun! Wonder how to make black and white hair not look grey, purple, etc.
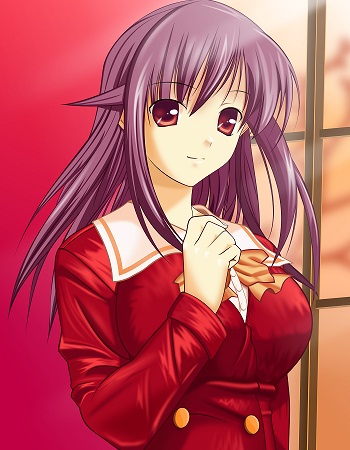
The stone will look correct if you use similar colors to your drawing’s surroundings. For example, if her shirt were red, I would add more red tones to the hair. I tend to use colors already on the drawing and play around with them. Like this hair strand in a blue and red room: there’s a bit of each color on it. (Draw Color Anime Hairs)
But if you are working with complicated hair like a rainbow or gradient, you can set a new layer on top in Multiply blending mode and test out which colors work better without messing up the slope.
Highlights
This part is enjoyable, and there are many ways to add shine to the hair.
Yes, even white hair!
I like to airbrush the skin color on the bangs, so it will show when I add white highlights on top!
If you don’t know which color to use, you can take the hair color, create a new layer, set the blending mode to Add (Glow), and add blobs, triangles, lines, etc. Any shape works, so do what fits your taste, and then use hue and saturation (Ctrl+U) to change the color to a tone that matches.
When I add highlights, that’s when I also add messy strands. We all struggle with messy hair, right?
Another little thing I enjoy is making the eyelashes and eyebrows transparent. You can easily do that by locking the lineart layer and then coloring with a darker color than the hair or lighter. Try it out; it depends on the hair color you are using and if your lineart is set as multiply or not.
Conclusion
Maybe you’re still unsure how to draw hair even after this tutorial, but I don’t expect you to be a pro suddenly. As I always say, art takes time.
So at the very least, take away this important point from this: use references! I can’t repeat this enough but make sure to use them mindfully.
I believe you don’t need a step-by-step to learn something. Instead, try to understand things in your way. As long as you enjoy what you do and are up for the challenges life will bring, you will grow as an artist!
Practicing is critical, but patience and passion make up the door.
Special Keywords – Easy Anime Hairs Drawings, Anime Girl Drawing, Anime Drawings, Anime Drawing