Contents
Complete Guide on How to Draw Manga
How to Draw Manga – New to drawing lies? Are you looking for some inspiration or to improve your process? A Complete Guide to How to Draw Manga is one of the top online resources in Manga art and offers a complete idea of getting started with Drawing Manga-Style Characters. Start at this page with our full view or jump to one of the specific tutorials below.
So you are a liar, and you love to paint?
Good! You are in the right place.
This guide is aimed at intermediate artists who want to enter the world of manga characters first. First, let’s examine some of the tools you will need. A photo tablet or a digital drawing pad is highly recommended, and digital art software such as Corel Painter.
You will also need a pencil and paper to make your first drawing and a scanner to insert the image into your PC. That’s about it, really … Without time, motivation, and determination. (How to Draw Manga)
What can you Expect from this Study?
I will break it down into several sections to make it easier to follow. We will cover everything from your original character design to the ugly drawings and inks, the printing, and the coloring. Not all Manga are created equal – there are tons of nuances depending on your style.
Because of this, we will focus (at least in detail) on the drawing of the eyes, faces, and the differences between the male and female characters.
This course will focus on drawing a character’s head to keep things simple. Check out other lessons over time to get the most advanced tips on the body, posture, hands, feet, etc.
So, where you go. Once you have collected all your tools, you are ready to start. (How to Draw Manga)
Step 1 – Coming to the Perspective of Your False Character
This part should be a piece of cake. You have a million floating ideas in your head – all you have to do is choose one.
It’s easier said than done, I know. But in this lesson, let’s start with a simple person (male or female).
Once you have something in mind, start writing down the worst doodles of how you want things to look. You find the character’s features, style, style, etc. Don’t focus on quality linework or anything here – you need something as a basis for your actual drawing.
It is a good idea to use something as a reference when exploring what you want your character’s features to look like. Find more photos of your favorite manga characters online, or use pictures of real people. Anything that works best for you. (How to Draw Manga)
Great resources for finding different characters are Pinterest, Anime-Planet, and my anime list.
Step 2 – Drawing Your Character
Now comes the happy part. Grab a new, clean piece of paper, your favorite pencil, and draw. If you are not traditional, you can use a tablet or drawing pad and make your drawing directly on your computer. Is the future uncertain? (How to Draw Manga)
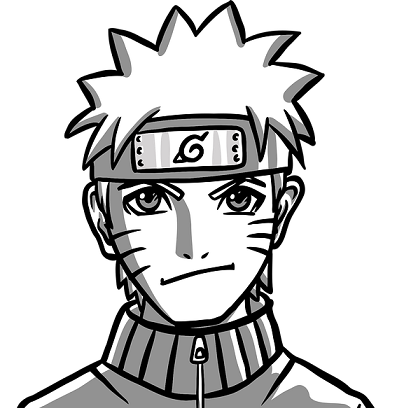
Drawing Manga
Manga Face Sketch
With this lesson focused on the topic, it seems to be as good a place as anyone can start.
Using light pressure, start with a basic facial shape (don’t worry about hair or any features yet). Once you are satisfied with the size, angle, and form, you can start planning where you want your eyes, ears, nose, and mouth to stay.
Now, you can imagine that the eyes will be easier to draw, as you see how everyone has them and you see them all the time. They are one of the most subtle forms of artistic creativity – especially for manga characters, as they talk a lot. (How to Draw Manga)
As a result, the eyes find their tiny stage in this study.
Section 2.1 – Drawing False Eyes
There are probably hundreds of different styles you can use for the eyes, but we will go over some of the basics. For obvious reasons, male eyes are very different from women, just as “bad” eyes look very different from “good” eyes. We can spend hours checking everything, so we will keep you simple in this tutorial.
If you like this, quora’s answer is a detailed (if incomplete) explanation of what eye features can mean when drawing your Manga.
Manga Eyes
Let’s start with the primary female eye first. Start by drawing a curved line (remember to press a little) where the top of the eyelid and eyelashes will rest. (How to Draw Manga)
From here, you will want to draw a large oval shape at the bottom, approximately the same width as the first line formed. Leave one side of the oval open (this will be completed later during the coloring process).
Now you have to have something that starts to look like the eye. If for any reason you are not happy about it so far, gently wipe and start again. That’s why you press a little with a pencil. When inking begins, there is no going back.
Inside this first oval, you will want to draw another small oval slightly covered at the top with eyelashes. Then draw another oval around the reader to represent the iris (the colored part of the eye). If you are tired of drawing ovals, it is worse … There is more to come.
The following section is a ubiquitous sight between the eyes of a manga character and anime.
Bright light.
These shows are called “catchlights” in both film and photography for those interested.
It forms a small oval near the upper part of the eye, covering most of the iris but also slightly of the pupil. Draw a second, and it should be a small oval on one side of the eye, closing the area where the iris meets the white of the eye.
Female Manga Eyes
Let’s make the lashes look more … flashy. Under the eyebrow line at the beginning, draw a few curves near the outside of the eye to give it more detail. (How to Draw Manga)
Now we come to another place. Which eye is beautiful without an eyebrow? Draw another thick curved line above the eye contour shape of your first line of eyebrows.
How much you draw the curve and what angle you are in ultimately depends on what statement you want to say. Play with a few different ideas on paper to feel them. From here, feel free to add a few extra strokes or lines of detail wherever you see fit.
And when you have it – the art of the false eye of the woman.
Male Manga Eyes
Now let’s try to draw a male eye. The whole concept is very similar, but you will see the difference.
First, draw your curved eyebrow line as you did in a woman’s eye. Then, draw a second curved line (slightly thinner at this point) below to represent the lower eyelids. This line should not be as long as the one above. (How to Draw Manga)
Near the surface, draw a small circle of the reader and circle that with a more extensive process on the half of the iris. Again, self-disclosure is entirely up to you.
You will notice how much the exposed iris can drastically change the character’s mood. To give the eye a more masculine look, draw some curves in the corners to emphasize wrinkles on the skin and a long, thin line over the eyelids to make the eyelid stand out.
All that is left now is the eyebrows. Make a thick, curved line above the upper eyelid and see how you feel better. Men’s eyebrows, which tend to vary in thickness – are usually broad in the middle, have tiny tips, but feel free to write them the way you like.
And that’s the way to draw the usual manga eyes. Also, there are hundreds of different styles, but they all seem to follow an unusual pattern. Play with different ways to see what works best for you.
Section 2.2 – Face Drawing
Does your character have other traits that most people have? No, so let’s fix that.
Start by drawing the weakest lines on the head to mark where you place your nose and mouth. Like the eyes, there are many ways to paint the nose. (How to Draw Manga)
For most manga and anime characters, the nose is made up of just a line or two and some color. There are no heavy details in the nose, bridges, or anything like that – a straight vertical line is all you need.
Drawing a False Face
The mouth is a little cunning as it almost looks like eyes. Let’s move on and draw a closed base mouth with a small smile. Also, this will contain a few lines and some shading, but you can try more with it.
Draw a line under the nose about the length from one learner to the next and give him a slight curve. Next, draw a short, thick curved line below the first by keeping the same shape. This separates the lower lip.
That’s all about it in the nose and the simple mouth. For other features such as stains, wrinkles, scars, or spots, you can play in various ways. Just remember to keep your lines neat so you can make changes quickly. (How to Draw Manga)
Now that you have your character’s head with all the necessary facial features, it’s probably a good time to add ears and hair (unless you like baldness … Baldness is cool too).
Ears are relatively simple unless you show them close. In this study, they will be fundamental. Usually, the ears should move from the top of the eyes to the bottom of the nose.
It is usually a good idea to look at a picture of the ear to get a guide in the middle of this section to get a solid view of the shape. The earlobe will be bigger than the head of the ear, but it is entirely up to you to decide how big it should be or what shape it looks best.
False Hair – this is where you can use your imagination. Short, long, curved, straight, spiked, bangs, tied back. The options are almost endless. Let’s keep it simple, though.
Gradually, draw a strong outline of the hair. Don’t worry about parts or points or anything like that right now. Just focus on where you want the hair to sit and how it should be placed on the ears. You can start exploring the lengths, bangs, and other beautiful details here.
Unlike natural hair made up of millions of individual strands, manga hairs are painted in several layers or clumps. If the hairstyle is your favorite style, you can start adding thin strands to all the different parts of the hair to show how flowing and where the shadows will lie.
Step 3 – Ink Your Drawing
That’s right – things should look perfect at this point. Your character is drawn the way you like and is ready to go into inking. There is no going back after this step. (How to Draw Manga)
Inking Your Manga Drawing
Take a quality, well-crafted pen (or black pen when using the tablet) and very slowly and carefully check your lines. It is best not to lift the cell in the middle of the line – try and keep the pen firmly in place.
When everything is well defined, let it dry slightly, then gently wipe any remaining lines of paint. If done right, you should be left with a picture that looks very clean for your character.
Whether you use digital media or pen and paper, Tom Richmond has an excellent ink lesson if you want to take a look.
Phase 4 – Coloring and Shading
You are about to finish. Are you happy yet?
If you use a tablet or a keypad, your image should be on your computer. You can continue to open it in Painter for any program you like to use for blurring and color counting.
Once you have created your drawing on paper, make sure you do not have any debris and scan it on your PC.
When it comes to photo editing software, the possibilities are endless. There are hundreds of books that go beyond all aspects and provide thousands of tips and tricks, but we will keep you basic in this study and give you a very comprehensive view of what goes into counting and digital coloring.
So, it would help if you now had your picture on your computer. Keep opening your drawing in your favorite program. (How to Draw Manga)
It is a good idea to divide your drawing areas into several layers. Create a background, hair, skin, and eye layer. This makes things easier when you make a mistake and need to postpone something.
Color in Your False Character
Color & Shading Manga
Choose which area you would like to start with first, and with the brush tool and color of your choice, start filling in the white space. Take your time so you don’t get out of line (magnification tool helps fill those small, hard-to-reach areas). Repeat this step for each layer until your whole picture is as colorful as you like.
If you are satisfied with your character’s colors, you can move on to shading. Blurring is very similar to what you just did, but you will want to use a more powerful, softer brush tool and move on to the part of the hair that should be lighter than the others.
Adjusting the light can be challenging, so use the image to get a reference or keep playing until you find something you like. Like I said, using photo editing software can be very difficult, so take your time trying new things and see what you can come up with.
When you are done, you can wrap all the layers and export your image to .img, .png, or any other file format of your choice. (How to Draw Manga)
So, what was it like? If this is your first time drawing a manga, keep rehearsing it. The more you draw and plan, the better. When you hear that you have foundations on the ground, check out some Advanced Studies, and maybe one day, you will publish your Manga.
Special keywords – How To Draw Manga Characters For Beginners, How To Draw Manga Eyes, Draw Anime Characters Online, How To Draw Anime Characters Body