Contents
Learn stippling with expert-backed Tips
Pointillism is a type of drawing that involves creating shapes and images by making many small dots on a sheet of paper. Similar to creating real-life “pixels,” stippling is a fun form of drawing that’s fun for anyone and everyone. If you’re looking for a new challenge or just a creative way to spend a few hours, try stipple size.
Method one
Prepare your project
- Assess the image you are rebuilding. While you can certainly create stipple drawings from imaginary images, it’s much easier to use hard copies to check as you draw. In addition to figuring out where people and objects fit into your composition, there are a few other important elements you’ll want to look for. With your drawing in front of you, look for:
The light source and the direction of the light. The light will determine which areas need more stippling and which need less.
value of drawings. This is where each color (or shade) resides on a grayscale image – how dark or light it is. Value is tied to light.
shape in the figure. You will create all your figures and objects without using any lines, so pay attention to the shapes that make up your figures and recreate them using stippling.
- Decide on your medium. Because stippling is simply the process of creating hundreds of tiny dots that make up an image, you can use many different media to create these dots. Higher quality stippling has more dots per square inch, which means they are made with drawing implements that allow very small dots to be made. Keep this in mind, because while you can use almost any medium you want to create your images on, the smaller your markers can be made, the more realistic your images will look. Possible stippling media include:
A fine-tipped pen. Most artists who do high-quality stippling use fountain pens with 0.03 or 0.005 inch (0.0 cm) nibs. This allows for tiny dots and lots of shading.
Pencils – colored or other colors. Although using a pencil may smudge the graphite and mix the colors, you can use it to create small dots. Colored pencils are less likely to smudge than graphite and will add a little interest (and difficulty) to your images.
painting. Paint is often considered the most difficult stippling medium because it is much easier to accidentally create strokes/lines than with a pen or pencil.
- Determine the density of points. Before you start making any dots, you need to decide how densely to draw them. More detailed images can be produced with a higher density of dots. Keep in mind that images with a lot of dark values will require more stippling than images with a lot of light. Try drawing a set of dots on a strip of paper, creating different shades of gray (or colors, if you’re using colored pencils) by spacing the dots apart by varying amounts. You can then refer to this paper when creating your final project.
The higher the density of dots, the more time it will take to reconstruct the image.
If you don’t want to invest a lot of time in your project but still need dark values, try using a pen with a larger nib (such as a .1) or a different medium that creates larger spots.
Method Two
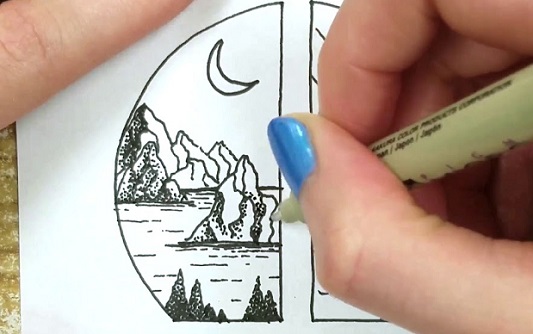
Stipple image
- Select a starting point. Review the original image to decide where on the drawing you will start stippling. Usually, it’s easiest to choose the darkest point in the drawing. That’s because you have more room for error in the dark parts, since you can add more points to cover up anything you might be doing wrong.
- Start stippling. Carefully lift the pen (or other utensil) and press it against the paper. The closer the dots are placed, the darker the area on the paper will appear. Start with the darkest point and work your way around the image, filling in all dark areas. Finally, start adding brighter areas by adding points that are farther apart from each other. When stippling, remember to:
Keep all points evenly spaced. Although you can place some points close together and others far apart, the finished work will look more attractive if the points are evenly spaced.
Avoid making dashes. Nothing ruins your stippling project faster than adding dashes instead of dots. Be sure to lift the pen (or other utensil) completely off the paper before putting it down.
Move slowly. Speed is not your friend when stippling. You are much more likely to make major mistakes if you work quickly than if you are patient and take your time. Stippling is a very time-consuming exercise, so be prepared to devote hours (or weeks!) to one project.
- Add details. As the main shapes start to emerge, start adding small dots to the pattern to create lines and shapes. From a distance, the points look like lines. Take a closer look and you’ll see them for what they really are. You can also choose to start stippling your image with a more dramatic pattern. For example, stippling all points in a row/column or diagonal. These patterns are only noticeably visible in close-ups and in brighter (emptier) spaces.
Shadows have to be stippled more to create darkness.
Light areas should have the smallest stippling and highest lights, called untouched highlights on the white paper.
- Finish your project. Stippling can take a long time to complete, so don’t rush it. However, when you think you’ve done your work, step back and look at it from a distance. The real test of pointillism is its ability to create shapes and figures from a distance, not just when you’re standing close. If your stippling is dense, from a distance the dots should look like painted shapes, not just dots.