Contents
Working for Art Commissions: 5 Essential Steps to Turn Inspiration into Success
Creating commission art can be a great way to increase revenue and, if all goes well, develop lasting relationships with art collectors. However, this process must be handled with care, as there are many potential pitfalls.
Foremost among these negative situations is poor communication and unreasonable expectations of the artist and the client. After all, this is a business venture, not an opportunity to establish freewheels.
Here are five essential rules to keep in mind when considering any job application to be successful.
5 Key Guidelines for an Effective Art Commission
1. Link to Subject
It is essential to have a strong study relationship. I have found from experience that if my heart is not at work, it will probably not go well.
I have a wide range of interests in the arts, but I will reject it if the topic does not cause sparks.
2. Say No to Pictures of an Outside Person
I do not paint references for photos provided by others. If I have not seen the lesson myself, I cannot interpret it fluently.
3. Communication Is Important
There should be good communication between the client and you. Explain in detail what you are going to do, what schedule, and what day.
The client knows exactly how much the project will cost and when the money is needed.
4. Create Photoshop Mockups
To make sure we all agree on the title, the type of image and the final art space, I often create three subtle expressions of songs that can be in colour, either by watercolour or by Photoshop. To build trust, I do this free of charge.
Photoshop is handy for making fake because one can re-paint, rearrange, re-rename, and create an image-text to make realistic fax of the final drawing.
I recommend asking the client to sign one of the photos before proceeding with the project. If the client can not agree at that time, try creating one or two more – if he can be clear about his concerns and if the project is big enough.
5. Rise Price
I do not participate in price negotiations. My sizes and values are posted on my website.
Regarding price, one might argue that a custom function should carry a high-value tag because it is a distraction from the artist’s normal flow of structured work. Some artists charge extra for this.
The artist needs to be happy, too! Please keep reading to learn how I put together my successful piece, titled Meadow Light.
From Concept to Commission, Step by Step
With this custom of art, my client based in California, a former native of Kansas, was looking for something that would remind her of the forest and meadows she grew up in and loved.
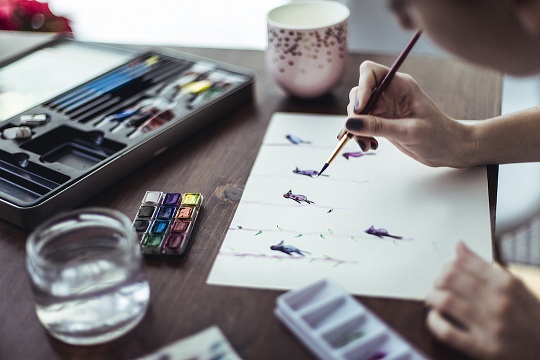
I created three small watercolours for this 30- x 40-inch oil commission based on the morning light flowing through the tall trees around my area. When I do my preparatory work diligently, I always present three solid options for the client to choose from.
Working with three gives clients enough options that they will often make one choice without feeling like they need to see more. Similarly, giving clients a few good options is also an excellent strategy for improving future work.
In the case of Meadow Light, my client was pleased with the final drawing (which used the second of the first three options) and finally ordered two more! This has happened many times over the years.
Building Materials
I never cut building materials when working for an art commission — no matter how committed I was to cutting money for my studio work. When it comes time to produce a piece of customer art, it has a right to expect the best.
I buy high-quality heavy stretchers. If the image is more than 48 inches in any size, I go with the Best Pro-Bar aluminium/wood composite bars. They will never bend or bend. On top of the stretchers, I use Belgian oil-primed high-quality linen. (See this article on our blog for how to stretch primed canvas)
Once I am satisfied that I have the support of a square and properly stretched painting, I paint in my construction using light brown oxide reduced with mineral spirits and a painting tool.
With this article, I decided to draw a tonal block-in. This is the Old Master method, in which all the painting is done in one or two colours, with all the correct values and textures precisely raised.
I have used this method because of the effects of the excess light I was trying to represent. Since oil painting is a radiant process, I can emulate a white titanium tube in contrast to natural, additional light.
All other prices must be below that value. Once I got this effect right into the tonal block-in, I only needed to match the already established values with the over-painted colour and glazing next.
Mixing Color
Pallet 1 With Green Thread
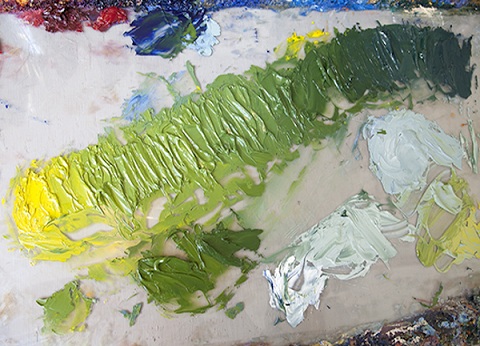
I prefer to mix my colour with strings, from light to dark, usually warm to cool. This ensures colour consistency and gives me very different temperatures, shades and values to choose from as I go through the process.
Most importantly, once these colours are carefully blended, I do not have to stop mixing new paint, and I am not tempted to add a new, non-disharmonious colour to the mix.
Pallet 2 With Green Thread
The pictures above show the two combinations I created to cover all the vegetables needed for this approved drawing. For the first mix, I used cadmium lemon mixed with raw sugar.
For the second mix, I used yellow cadmium mixed with ultramarine blue. This has given me a wide range of cooling and cooling to work on.
Colouring, Part 1
Using large, flat brushes, I painted in large quantities carefully to match the values of my block correctly from the start. When I do this, the work goes faster, and I can not even begin to lift the edges as I continue to compose.
I’m a fan of pentimento. As you can see in the picture above, I leave as much of the paint below shown as possible. Minor warm, reddish-brown tones work vibrating with vivid green.
A functional backward, cool to warm, makes sense to create depth of space and tone.
Colouring, Part 2
At this stage, I did not worry about the details but rather the abundance of colours and attitudes. Using 1-inch and 3/4-inch hog bristle flats and filberts, I turned on the backlight rays to see how these features could be handled.
After identifying the light streams, I realized that these effects should be applied to wet paint. My method was to use hog bristles for as long as possible, only to switch to sables for one last touch and soften the hem.
Colouring, Part 3
It is a good practice to sharpen a piece of art from the centre of focus, on the outside. This is how we see naturally.
If the focus area is well resolved, then the periphery of the drawing can have tiny details, have a soft-focus effect, and still work well.
Adding Last Touch
John Hulsey Meadow Walk IV, finished piece, 30 x40, oil canvas, size
Edge editing is done in the last step, any price adjustments are made, and details are added, deleted, or filtered. At this point in the process, I worked very clearly, using impasto verses to get simple highlights.
As mentioned, I prefer to work wet and wet to create texture. If the area is already dry, I will repaint it to achieve the desired effect. This may sound like a lot of work — and not a lot of fun — but it is a minimal effort to paint this way rather than working on challenging dry paint.
At this point, we want our paint areas to come together as one and work together. We want our brush job to look fresh and wet as if the painting were created in an hour — all prima.
Closed Hand
Working with the timeline may require that the drawing be dried and sealed before delivery can be made and final payment can be made — which should be considered before starting.
To achieve that, I will use a medium that will dry quickly to speed up the process. I prefer the Gamblin line of mediums, and Neo Megilp is the simple method that I can use because it allows a lot of time to work but dries the paint film quickly.
If I need to work fast, I will switch to Gamblin’s Galkyd medium to stop overnight. Galkyd is a low viscous product, so it should be used differently than Neo Megilp gel.
Try them all first to understand the various features. Of course, if the paint layers are thick, it will take a lot of time to dry before any varnish is applied.
Unless I have a lot of comforts, I will usually apply a thin layer of re-varnish to the freshly dried paint to restore the lustre and light before I post it.
Therefore, I will advise the client on this and recommend that you have a local specialist apply a final varnish for six months or more.
When working with an excellent long-term client, you may want to invest in a trip to its destination and set yourself up for a visit.
This is a great way to cement relationships and often results in multiple commissions or sales of straight drawings.