Contents
How to Draw Takoyaki Step by Step
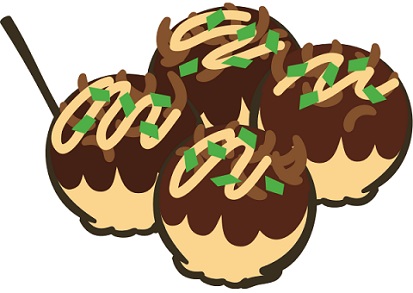
Draw Takoyaki – This tutorial shows you how to draw Takoyaki in nine steps. Examples focus on drawing in a way that fits the anime and manga and can also work in other styles.
Takoyaki is a common food in anime. It can be found in many venues, from events and festivals to characters who grab fast food to eat. Fried balls are usually stuffed with octopus, covered with sauces mixed with bonito flakes but may have other fillings and greases.
While drawing Takoyaki may seem easy at first, it is not as easy as it may seem. However, do not let that discourage you, as this study provides a very detailed visual breakdown and a description of the drawing process to help. (Draw Takoyaki)
Unless you are digital drawing, you should start with a pencil tutorial and make clear lines as you will need to erase the parts of the drawing in some of the steps.
Step 1 – Design a Takoyaki Container
Start by drawing a container that Takoyaki will enter. In this case, it will be a small cardboard box in which its sides protrude outwards (similar to a vertical pyramid).
The drawing will be done with a 3/4 view and a two-point view. As the view of objects becomes smaller as they move in the distance, the container will be pulled smaller as it moves towards the opposite sides of the viewer.
In this section, draw the container as if it were transparent so that all its sides are visible.
Step 2: Define Takoyaki Balls
There will be six Takoyaki balls in total. Draw them so that they do not fit slightly (not perfect circles) to look natural. (Draw Takoyaki)
Try to resize and place them to fit snugly in the container. If things go wrong the first time, delete that part of the drawing and try again.
You can see the step-by-step classification of the placement in the example above.
Step 3 – Clean Up Drawing
After you have finished drawing the Takoyaki balls, wipe their hidden/covered parts of the container. You should have a clean line drawing like the example above when you are done.
Step 4: Draw the Sauce
Covering the tops of the Takoyaki balls and running down the sides, add the sauce (as shown in the example).
Remember that the sauce has a certain volume in it. So, in addition to defining the moving parts on the sides, you will want to give it a “padding” at the top (shown in the picture above). Then wipe part of the base of each ball covered in sauce.
Step 5 – Draw Flakes
Sprinkle on top of Takoyaki add flakes. When you draw these, you can help to think of them as small rectangles of paper folded and threatened without stopping. (Draw Takoyaki)
Try and distribute them randomly throughout Takoyaki but with the same amount in each so that the painting looks beautiful and balanced.
Step 6: Add Sticks and complete the Line Drawing
Finally, add a few sticky sticks to a few balls to eat (similar to toothpicks).
Then check that the drawing looks good and trace over your lines to darken it.
Step 7 – Takoyaki colour
The colouring of the Takoyaki makes the dark sauce brown with balls of a mixture of orange, yellow and brown. (Draw Takoyaki)
Colour it so that it creates a gradient where the sauce/balls are light on the left and black on the right. You can also colour the light yellow/brown sticks to show hard.
When colouring the sauce, leave small highlights near its bottom edges.
You can see the places you want to place the highlights in the near-top example shown in red.
At first, you can leave the highlights in the white and the surrounding colour, then pass a little over the brown to not shine too bright.
When digitizing colours, add highlights to the end after adding shadows.
Step 8 – Add Shading to Container
The container will be white so you can darken it.
In this case, the blurring will be done as if the light were coming from the upper part of the painting (and slightly left). (Draw Takoyaki)
This means that the front of the left container will be much easier, and the right side will be darker. The inside of the bowl will be even darker as it will also have Takoyaki blocking some light. The ground will be much darker as Takoyaki will also block the light from reaching there.
Please keep in mind that since this is a stylish/simple drawing, you do not need to be precise in the way you place the shadows. You need to give a solid idea of everything so that the drawing looks three-dimensional.
Step 9 – Add Shading to Takoyaki
Finally, you can add shadows to Takoyaki (in addition to the pre-made gradient). Create tiny shading strands running under the sauce and another shading under Takoyaki balls. Depending on how big you draw them, you can also add very small shadows to some flakes.
You can see a large drawing of one Takoyaki ball on top to make it easier for you to see the shadows. (Draw Takoyaki)
Conclusion
Takoyaki is a common food for anime and manga that may seem easy to draw. However, drawing a detail like this in this example can be quite time-consuming. Do not let this discourage you. Looking at real anime, you may notice that many beautiful and intimate food drawings are usually displayed at just one angle. Once the characters have started to eat, the art is usually much easier.
This is because drawing food that looks delicious even with a simplified anime style can be difficult and time-consuming even for professionals. So don’t worry if it takes you a while to complete the course.
Special Keywords – Takoyaki Painting, Anime Food Drawing, Sushi Painting, Visual Art