Contents
How to Color Anime Character Step by Step
Color Anime Character Step by Step – This friendly beginner tutorial explains how to color a character in anime style with detailed examples and step-by-step instructions and explanations.
Anime Girl Color Step by Step
The color style used in the anime is known as “Cel Shading.” Cel shading is often used in images and artistic styles of manga / comic book and 3d rendering where no gradients are used between shaded and regular areas.
To keep this beginner-friendly, we will focus on using the slight blank shading commonly used in anime in most normal light situations.
You can also use the tips in this tutorial to draw some anime characters. Do not add extra steps if you color in a complex letter.
Color & Shading Order
When coloring and shading, a painting wants to start with large image areas first and work down to the smallest detail, you will also want to color in your entire drawing before adding shadows.
If you are going to paint on paper, make sure you leave the highlighted areas white. You can add highlights after coloring to the whole drawing if you color digitally.
Step 1 – Outline Drawing
Before you can color it, you should have a good and clean line drawing of your anime character.
If you need help drawing an anime character, you can see the Tutorials section of the site.
Step 2 – Dark Areas
The first areas you will want to fill in are any parts that will be completely black or the same color as the lines in the line drawing.
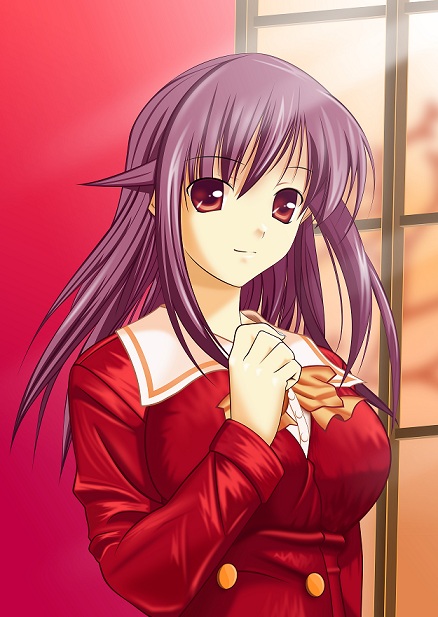
When you draw an anime character like the one in the example above, the dark areas will usually be eyelashes and eyebrows. Also, be sure to leave the reflection white when filling in the blanks when drawing on paper.
Step 3 – Body Color
As the body will be one of the largest areas of painting, we will color it first. In this section, fill in the whole area with one solid color
Step 4 – Clothing Color
In this case, the clothes are just a shirt. Fill it with one solid color-like body.
Step 5 – Hair Color
You also leave a bright white spot when painting on paper when coloring the hair. If you paint digitally, you can add more brightness to the color.
Step 6 – Eye Color
As the students become dark, they color in the iris of the eyes.
Step 7 – Oral Color
Color in the mouth area without teeth.
Step 8 – Body Shading
To keep the tutorial very easy, we will only use a slight blank shade to cover the body in areas that are often closed.
To this, we will add:
- Shadows on the head from the hair
- Dignity on one side of the nose
- Some small shadows around the eyelids
- A shadow on the neck worn on the head
- Shadows to emphasize column bones
Step 9 – Shading Clothes
Since the clothes of this model are sturdy and have no wrap, add a little shade under the chest area.
Step 10 – Hair Thinning
To retain the shade to a minimum of bare, the hair immediately darkens the inner area behind the hair.
Step 11 – Blurring The Eyes
Shade over the irises as they usually have a shadow/reflection when cast eyelashes.
Step 12 – Mouth Search
Finally, darken the mouth area without the tongue, and you have to do it.
Conclusion
On the other hand, cell blurring can be as simple as a primary shade, but it can be challenging to find suitable locations for the shade.